Friday, June 29, 2012

Crepe oh Great!


If you haven't tried a crepe or you have and hated it, try this one trust me you'll fall in love with it!
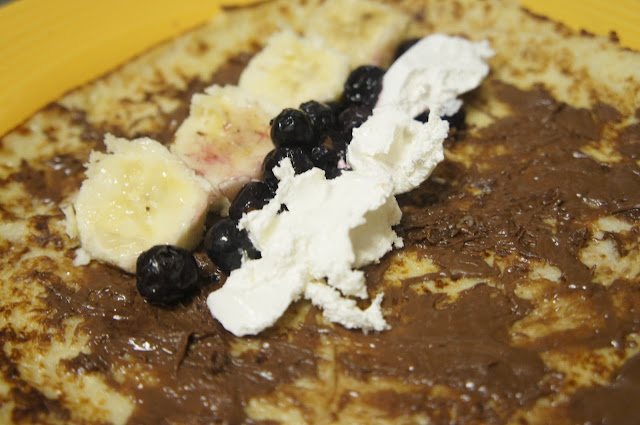
I call this crepe the blueberry, banana crepe, simple as that.

Ingredients:
3 eggs
1 cup whole-wheat flour
1 cup milk
3/4 cup water
1 tablespoon honey
1 teaspoon vanilla
1/4 teaspoon salt
1 tablespoon butter, melted + extra for cooking

The how to
Put all ingredients in blender and mix well. Let stand about 15 minutes.
Melt and swirl around a small pat of butter in an 8 or 10-inch frying pan over medium heat.
Angle pan and pour enough batter on one side to thinly and evenly cover the pan. Very quickly swirl the batter around to cover the pan in one thin layer.
Immediately use your cooking spatula to push down the thin edges of the crepe around the perimeter.
After about 1 minute (and once it is golden brown on the bottom) carefully flip it over without tearing the crepe.
Fry for 1 more minute on the other side (until it is golden brown as well) and then roll up each crepe.

Tuesday, June 26, 2012

There's a Place for Everything: Me addition


I love finding little deals here and there to make everything I need to come together without a hefty price. I needed all these things you see above but all and all I wasn't about to spend more than 20 bucks and I didn't! Whaahoo, so proud!
Here's the break down ladies:
-Craft scissors: $3.99
-Normal scissors: $1.00
-Stickies: $.75
-Hole punch: $2.99
-Pens: $1.99
-Tape: $1.00
-Silver tin: $5.00
-White buckets: $2.00
                                   Total =$18.72


Friday, June 22, 2012

There's a Place for Everything

 This post it pretty straight forward, so since I bought these crayons, colored pencils, and the paint I've had no where to put any of if but back in the original packages and that was a pain every time used them. Ting!! then it came to me get some containers and here we are now today.
containers courtesy of Target :)


Tuesday, June 19, 2012

My Side


 So I finally got my side of the room together to take pictures for the blog but don't count on it to continue to look the way it does now. A little break down of the room: my bed spread I got an amazing deal for it at Target. Originally 70 bucks but I got it for 29 so I was pretty satisfied. The little blue blanket is from Ikea at just $2.99. The bed frame it also from Ikea, I love the low(ness) of it and because I still co-sleep with my son it's not so scary to think he could fall of the bed because it's so low. Next the homemade curtains are favors of Ikea I sort of throw them together at the last minute so that's why they sort of look like they are falling apart but I like the look. Then we have the white shelf and slender black lamp from Ikea too. Oh how much I love Ikea! Finally is the "Post it Priortizer" I saw this on pinterest and just had to have it. It's a very easy printable to make as big or small as you want and a good thing to do with this, is to laminate it. I haven't gotten around to it but trust it will be done! (In a super hero sort of voice)

So I hope you love it as much as I do and feel free to take any ideas you may have been inspired by :)

Saturday, June 16, 2012

Octpus Hot Dogs!


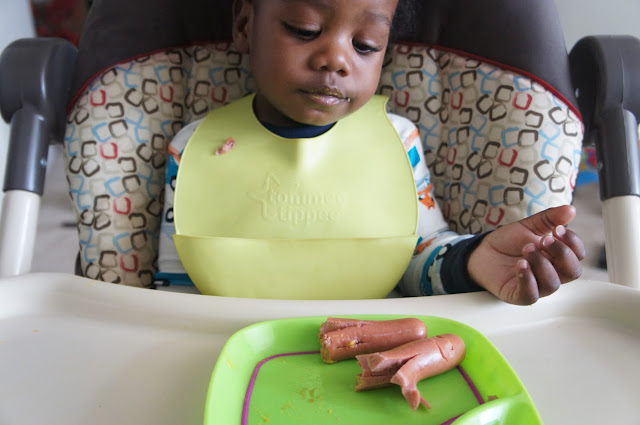
 As you can see I tried to make cute little octo hot dogs. They didn't quite turn out how I expected but it was close enough. Jaylen really liked them although his face in the first picture would suggest otherwise. He loved dipping them in the ketchup and the octo legs made the hot dog really easy to eat. So if you want to try this for your little ones it's really easy and pretty self explanatory. For more fun kid friendly food ideas I've found check out my "Foods kids will love" board!
 

Tuesday, June 12, 2012

The other binder


So like I mentioned in my late post about making a smaller binder for my coupons and menus. I ended up making it a larger binder because my sister gave me an idea to use the baseball card holders instead of the actually coupon holders I originally bought at staples. They only fit in the normal sized binders that I just went with those instead and they work amazingly and because there's 35 sheets with 9 pockets on each I only needed to get on pack. You can find them at Walmart by the check out.

So as you can see the front cover is a calender that works great for quickly writing down what I need to get at the store without opening it and then for the back, just like the other binders is just something that represents what the binder contains.

After that is just a mass grocery list I found on pinterest that's just good to have right up front when you open this binder as a reference to see what you might need but forgot. Then after that are 2 menus on for myself and one for Jaylen because right now he can't eat everything I can so it's good to have a separate one from me. Also both of those printables can be found in my printable board. In the next picture you can see I had to use sticky notes to label on the sheet and that's because I underestimated how well my dry erase markers would work on these sheet protectors so for not the sticky's work.

Then lastly you have the coupon section and at the top I used tabs and in between those tabs I will be putting sheets in between them so it's easier to flip to each section. Each of the tabs say fruits, drink, breakfast, lunch, dinner, snack, personals. And looking back I now see I need to add house care.

So that's my go to binder for all things food and it's really helped me out I keep it in the kitchen that way when I head out to the store I can easily see what I need on my list and fill it out and then head right out the door. I hope you guys find this helpful and if you have any questions don't hesitate to ask!


Tuesday, June 5, 2012

Strawberry Shortcake


This is a simple yet delicious treat to make for yourself or even the kids because the portion size is just perfect for their little hands. I hope you enjoy!

Ingredients:
- 2-3 starwberries
- whip cream
- vanilla ice cream
- dessert shells

Directions:
Put a small scoop of ice cream in the shell then add whip cream on top of that, then cut up your strawberries and top them on the whip cream then and a little more whip cream on top and leave an extra strawberry out on the side for dipping and enjoy, simple as that!


Monday, June 4, 2012

I forgot to mention!

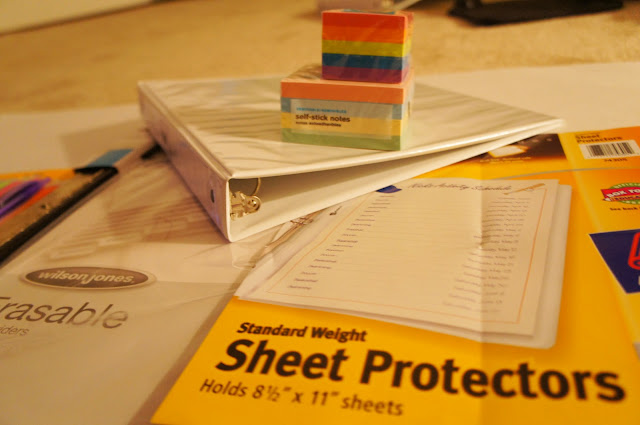
All the supplies used in creating the binders in the previous binder post, so here they are it's all really simple and reasonably priced things.


All supplies pictured here are from walmart one of my fave go to stores that has everything you need to anything really at a really great price.


Sunday, June 3, 2012

Get Organized with Binders


My binders are finally done! Yay! So behind the scenes of blogging I've been putting together my binders and that's one reason why I haven't been up dating daily as much. So in all I have 5 binders dedicated to my schedules, activities, recipes, important documents, and work outs. I do have a sixth binder but it's going to be smaller than these and I've been having trouble finding the perfect one that won't cost me 5 bucks for.


So the recipe binder is pretty self explanatory with a little twist. So I just added in the front before the tabs some very helpful info that I picked up at my local Publix that provides all kinds of info on food storage, preparation, facts and just all things about your food that everyone should know. And I know it's not very clear what the tabs say so here they are: breakfast, lunch, dinner, snacks, deserts, beverages, quick meals, and holiday treats. and in between each of them are the recipes in the sheet savers and right now not all of them are in sheet savers because I underestimated how many recipes I have so I need more more more sheet savers.


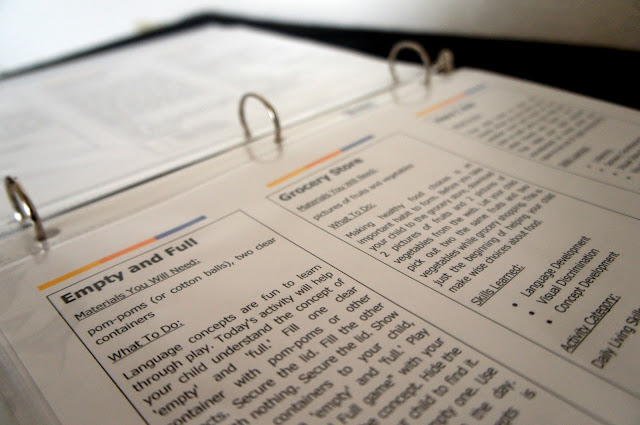
This binder above is the activities binder that's just for Jaylen. It consist of pages and pages of age approiate things for him to do up to age 2 right now and I hadn't seen this particular idea any where but I did find the list of activities here. It's a great binder to have for kids because it comes in handy when your little seems bored the the same old stuff and you can keep it forever and have it for the next kid that comes along and even then after they have kids you can pass it down to theirs!


The schedule binder it's the most used so this is basically my go to binder all day everyday. I find this set up much easier than a planner because you can make it your own and it's way cuter. And with the clear page protectors you can just use a dry erase so there's no need to print 52 pages for each week that might not even get fully used...I hate to waste. Especially because I have sooooo many printables that I want to use over the years I know I wouldn't want to reuse anyway so why not make the most out of all your fave printables. 
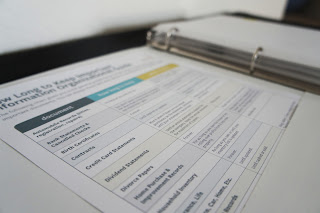
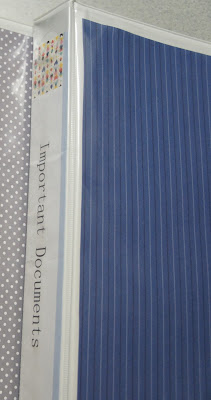
So for these last 2 binders the one above isn't quite done yet and I hate that because I wanted to get them all done before I posted this but I felt it was long awaited. Basically what will go in that one is workouts that I've copied and pasted from here with pics and a description of how to do the workout under each section for a workout for different parts of the body. So you could understand why it would take a little longer to put that together but I swear when it's all finished I will post about it. Now the binder below I forgot to take an individual picture like all the others so from the pic below you can catch what I was going for. With this binder, it's also used pretty frequently considering how much I shop so it holds all things important when it comes to money. I have a section for receipts, manuals, orders, car insurance info, lease and anything that I just don't want to lose but I need to be in one place so I can easily find it if I need to. Also the picture on the right is showing a cool printable I came across that has a breakdown of documents you should keep and for how long. It's very helpful to have something like that to always be able to refer back to when filing papers away.


Also for the fronts and backs of these that was all my idea to just use the fancy and very cute paper from joann's to put on the fronts and backs to give them life and also be able to easily know whats in each binder just but the cover.

Now I didn't pull this idea of these ingenious binders from just anywhere and I want to give all the sites credit that helped shaped my binders together so here they are:   

http://pinterest.com/taysherman/printables/
http://professorpoppins.blogspot.com/2011/03/family-planner.html
http://splendidmissm.blogspot.com/2011/08/welcome-to-day-two-of-getting-organized.html
http://www.thehouseholdplanner.com/products/weekly-pages/
http://iheartorganizing.blogspot.com/search/label/Spreadsheets
http://iheartorganizing.blogspot.com/2011/04/reader-space-jennas-fantastic-filing.html
http://blueeyedbride.com/2011/08/04/how-my-home-organization-notebook-changed-my-life-and-a-link-up/
http://printables.yourway.net/
http://www.writeclickscrapbook.com/write_click_scrapbook/2011/02/beginner-digi-week-day-4.html
http://www.howdoesshe.com/clean-mama-printables-giveaway
http://www.crystalwilkerson.com/2011/02/2011-planner.html
http://boldturquoise.wordpress.com/2011/08/24/putting-together-your-meal-plan-binder-for-the-year/#entry
http://abowlfulloflemons.blogspot.com/2011/01/weekly-challenge-1-home-management.html
http://www.designfinch.com/2011/07/31/sunday-planning/


all content is © 20012-2014 unexpectedly amazing. all rights reserved. please do not take images or content from this site without written permission.
Template developed by Confluent Forms LLC